
As mentioned yesterday, the Speedplay Light Action Stainless Steel pedals arrived at the door. This post will be purely about setting them up for a ride, not actually using them. That will be a different review.
Some history about pedals and this Non Pro Cyclist. I first used clipless pedals in the early 1990s. Shimano SPD (Shimano Pedaling Dynamics). The first pedals that I had were purple and white and single sided, which, on a mountain bike, didn’t work to well. I then changed to a double sided SPD pedal. Well, it had a cleated side and a flat platform on the other side. I continued using these for years. it wasn’t until I got the Avanti Giro 4 in 2011 that I finally dropped the SPD system in favour of the SPD-SL. Finally I was walking around sounding like a horse clip clopping about the place.
A few weeks back I was in the local bike shop and looking at a bike with Speedplay pedals on it. I didn’t think a real lot of it. But within a week, the order was in and they arrived yesterday. A few things happened along the way to help the decision, but I am sworn to secrecy about them. 🙂
The set up.
I had heard that the Speedplays can be a bit tricky to set up, so I sent an email off to Speedplay asking some questions. Steve Tyler from Speedplay Inc got back to me and was very helpful. He sent me some links to PDF files and also a video. I had a quick look at them, and it didn’t seem to hard to figure out. So off I went.
I was mounting the cleats to Shimano R087 shoes, which have a 3 hole attachment system. Speedplays use 4 holes, so you have to add an adapter. The adapter comes fitted with 1F and 1R shims, but I need to use the 4F and 4R shims. It was easy to remove the factory fitted shims and replace them with the 4F and 4R shims.
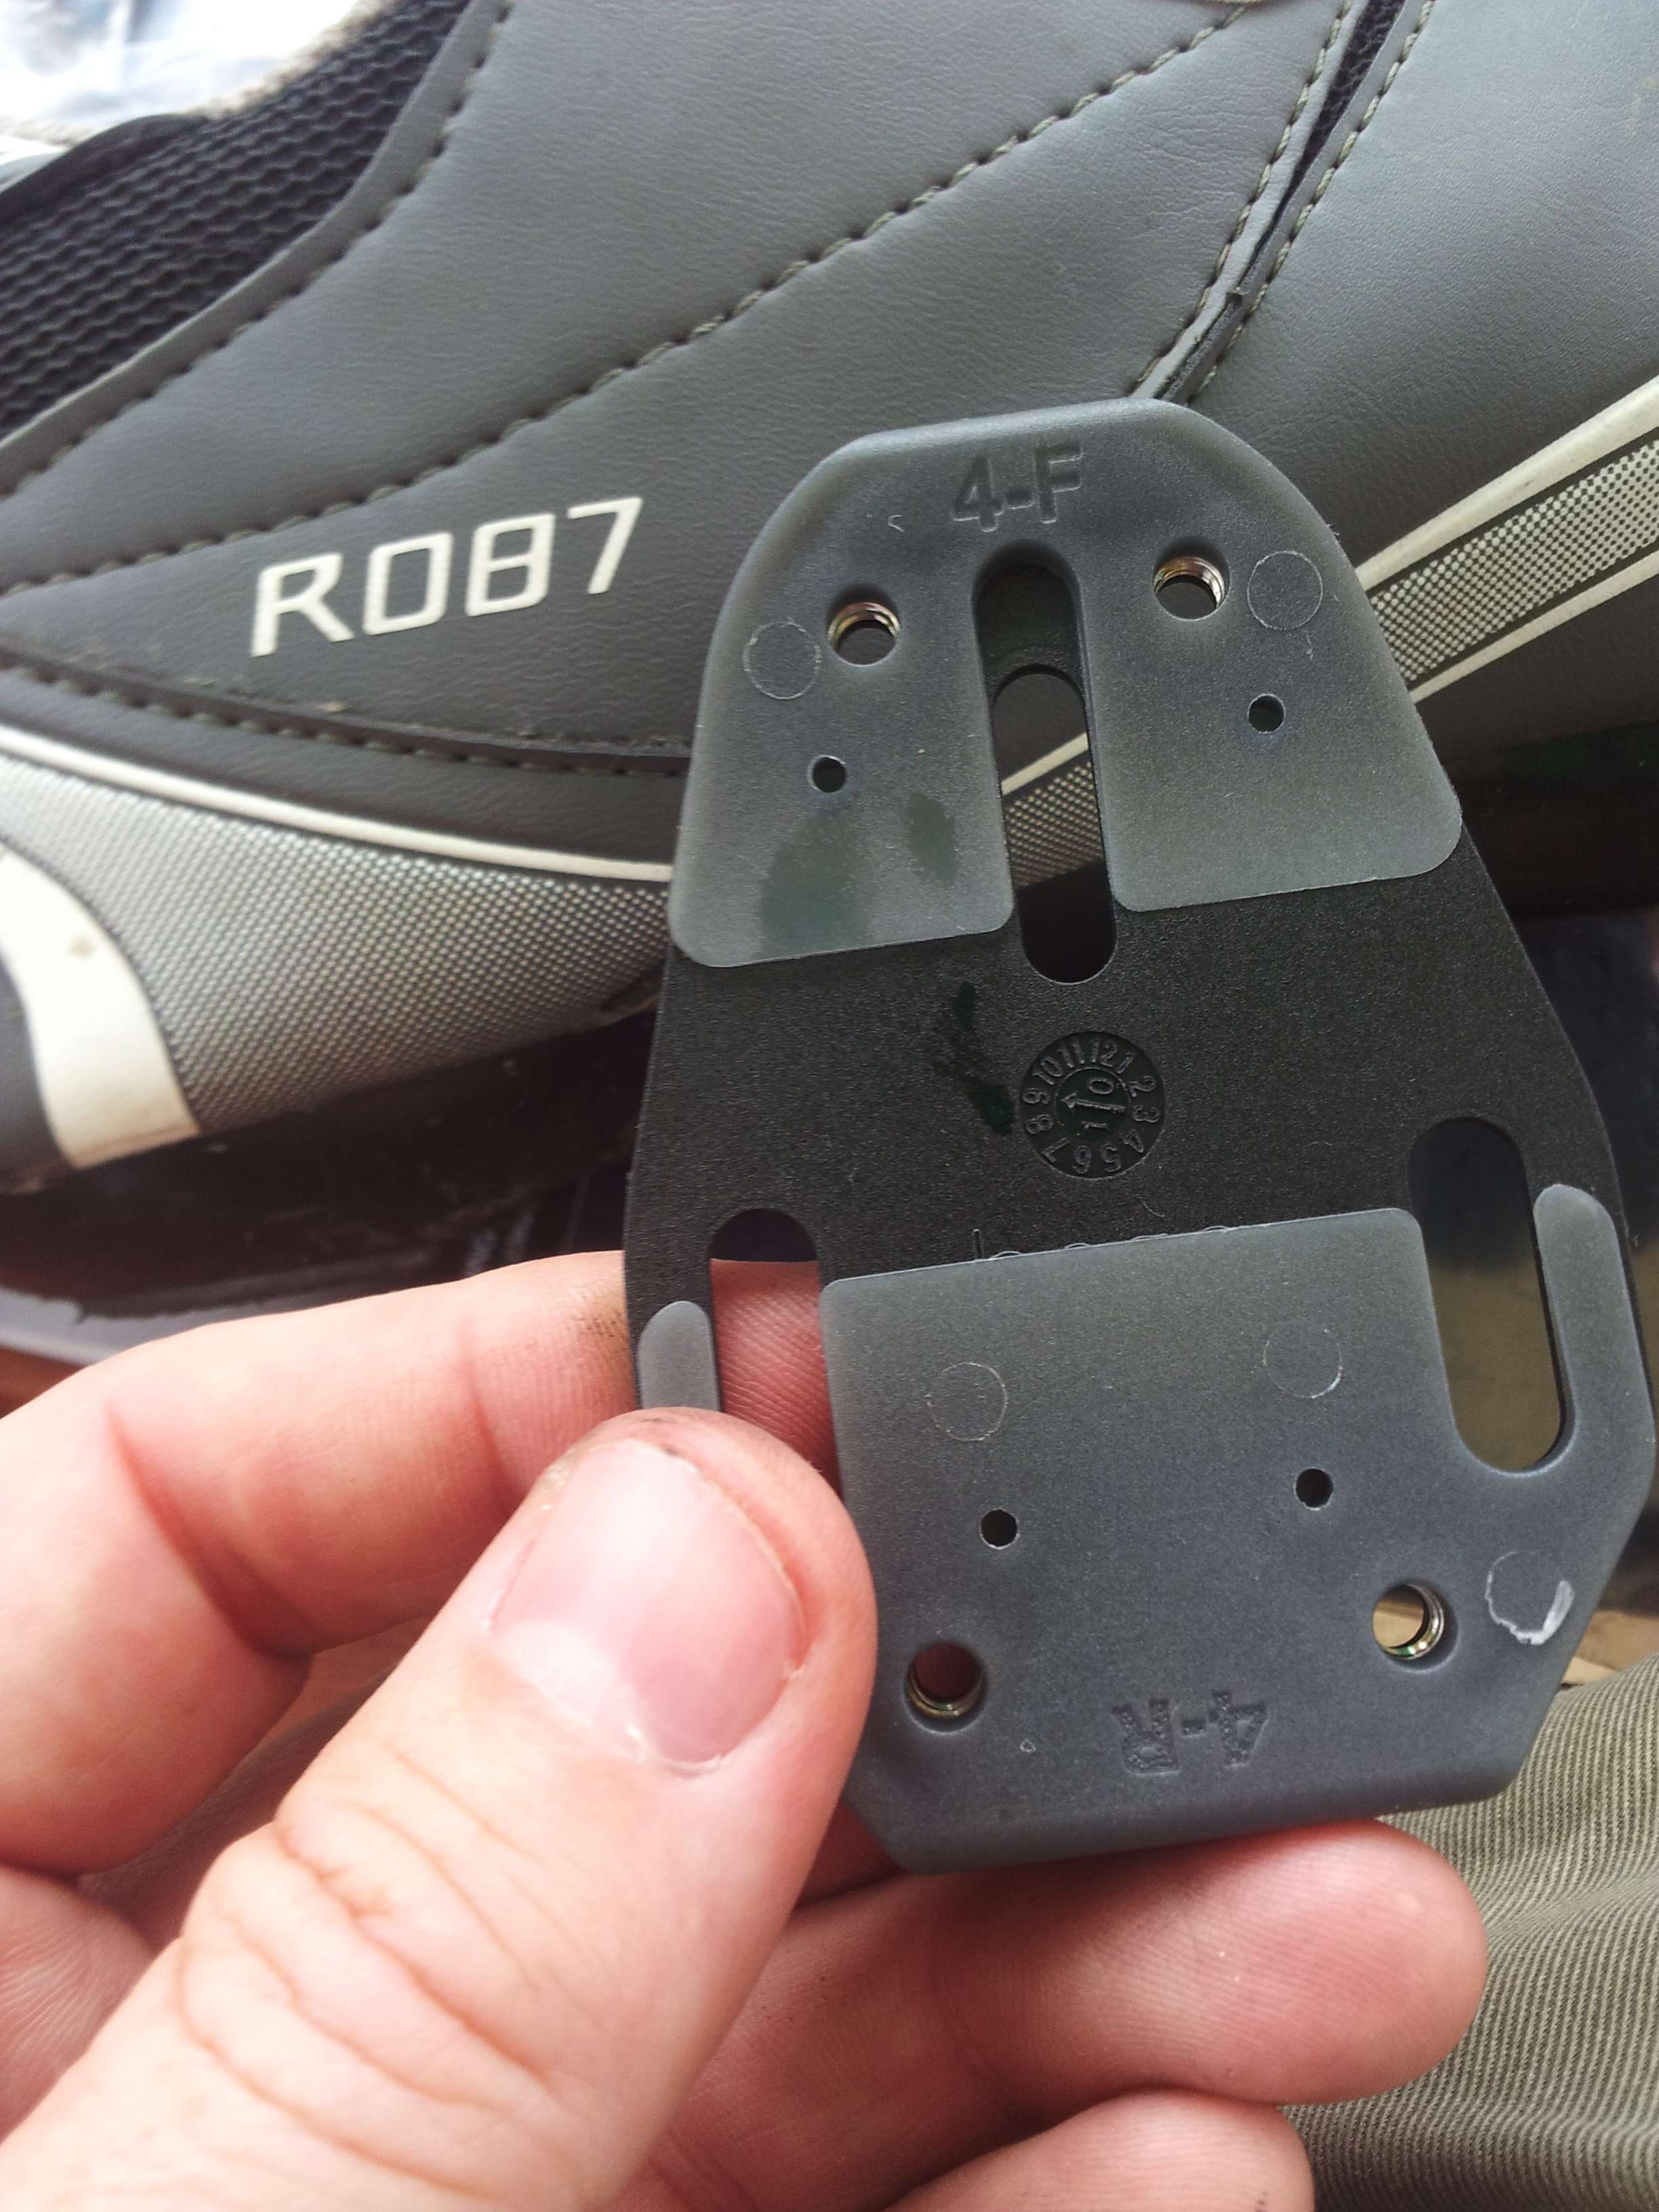
Base Plate and Snap Shims
The shims are to make sure the plate fits flush to the sole of the shoe. As can be seen below, it works pretty well.

Shims in place.
I had to use the longer of the cleat mounting screws, which are silver in colour. The shorter ones are black.

Base Plate mounted to Shoe.
Then you have to mount the actual cleat itself. Obviously with the cleat cut out on the inside of the shoe to accommodate the pedal spindle.
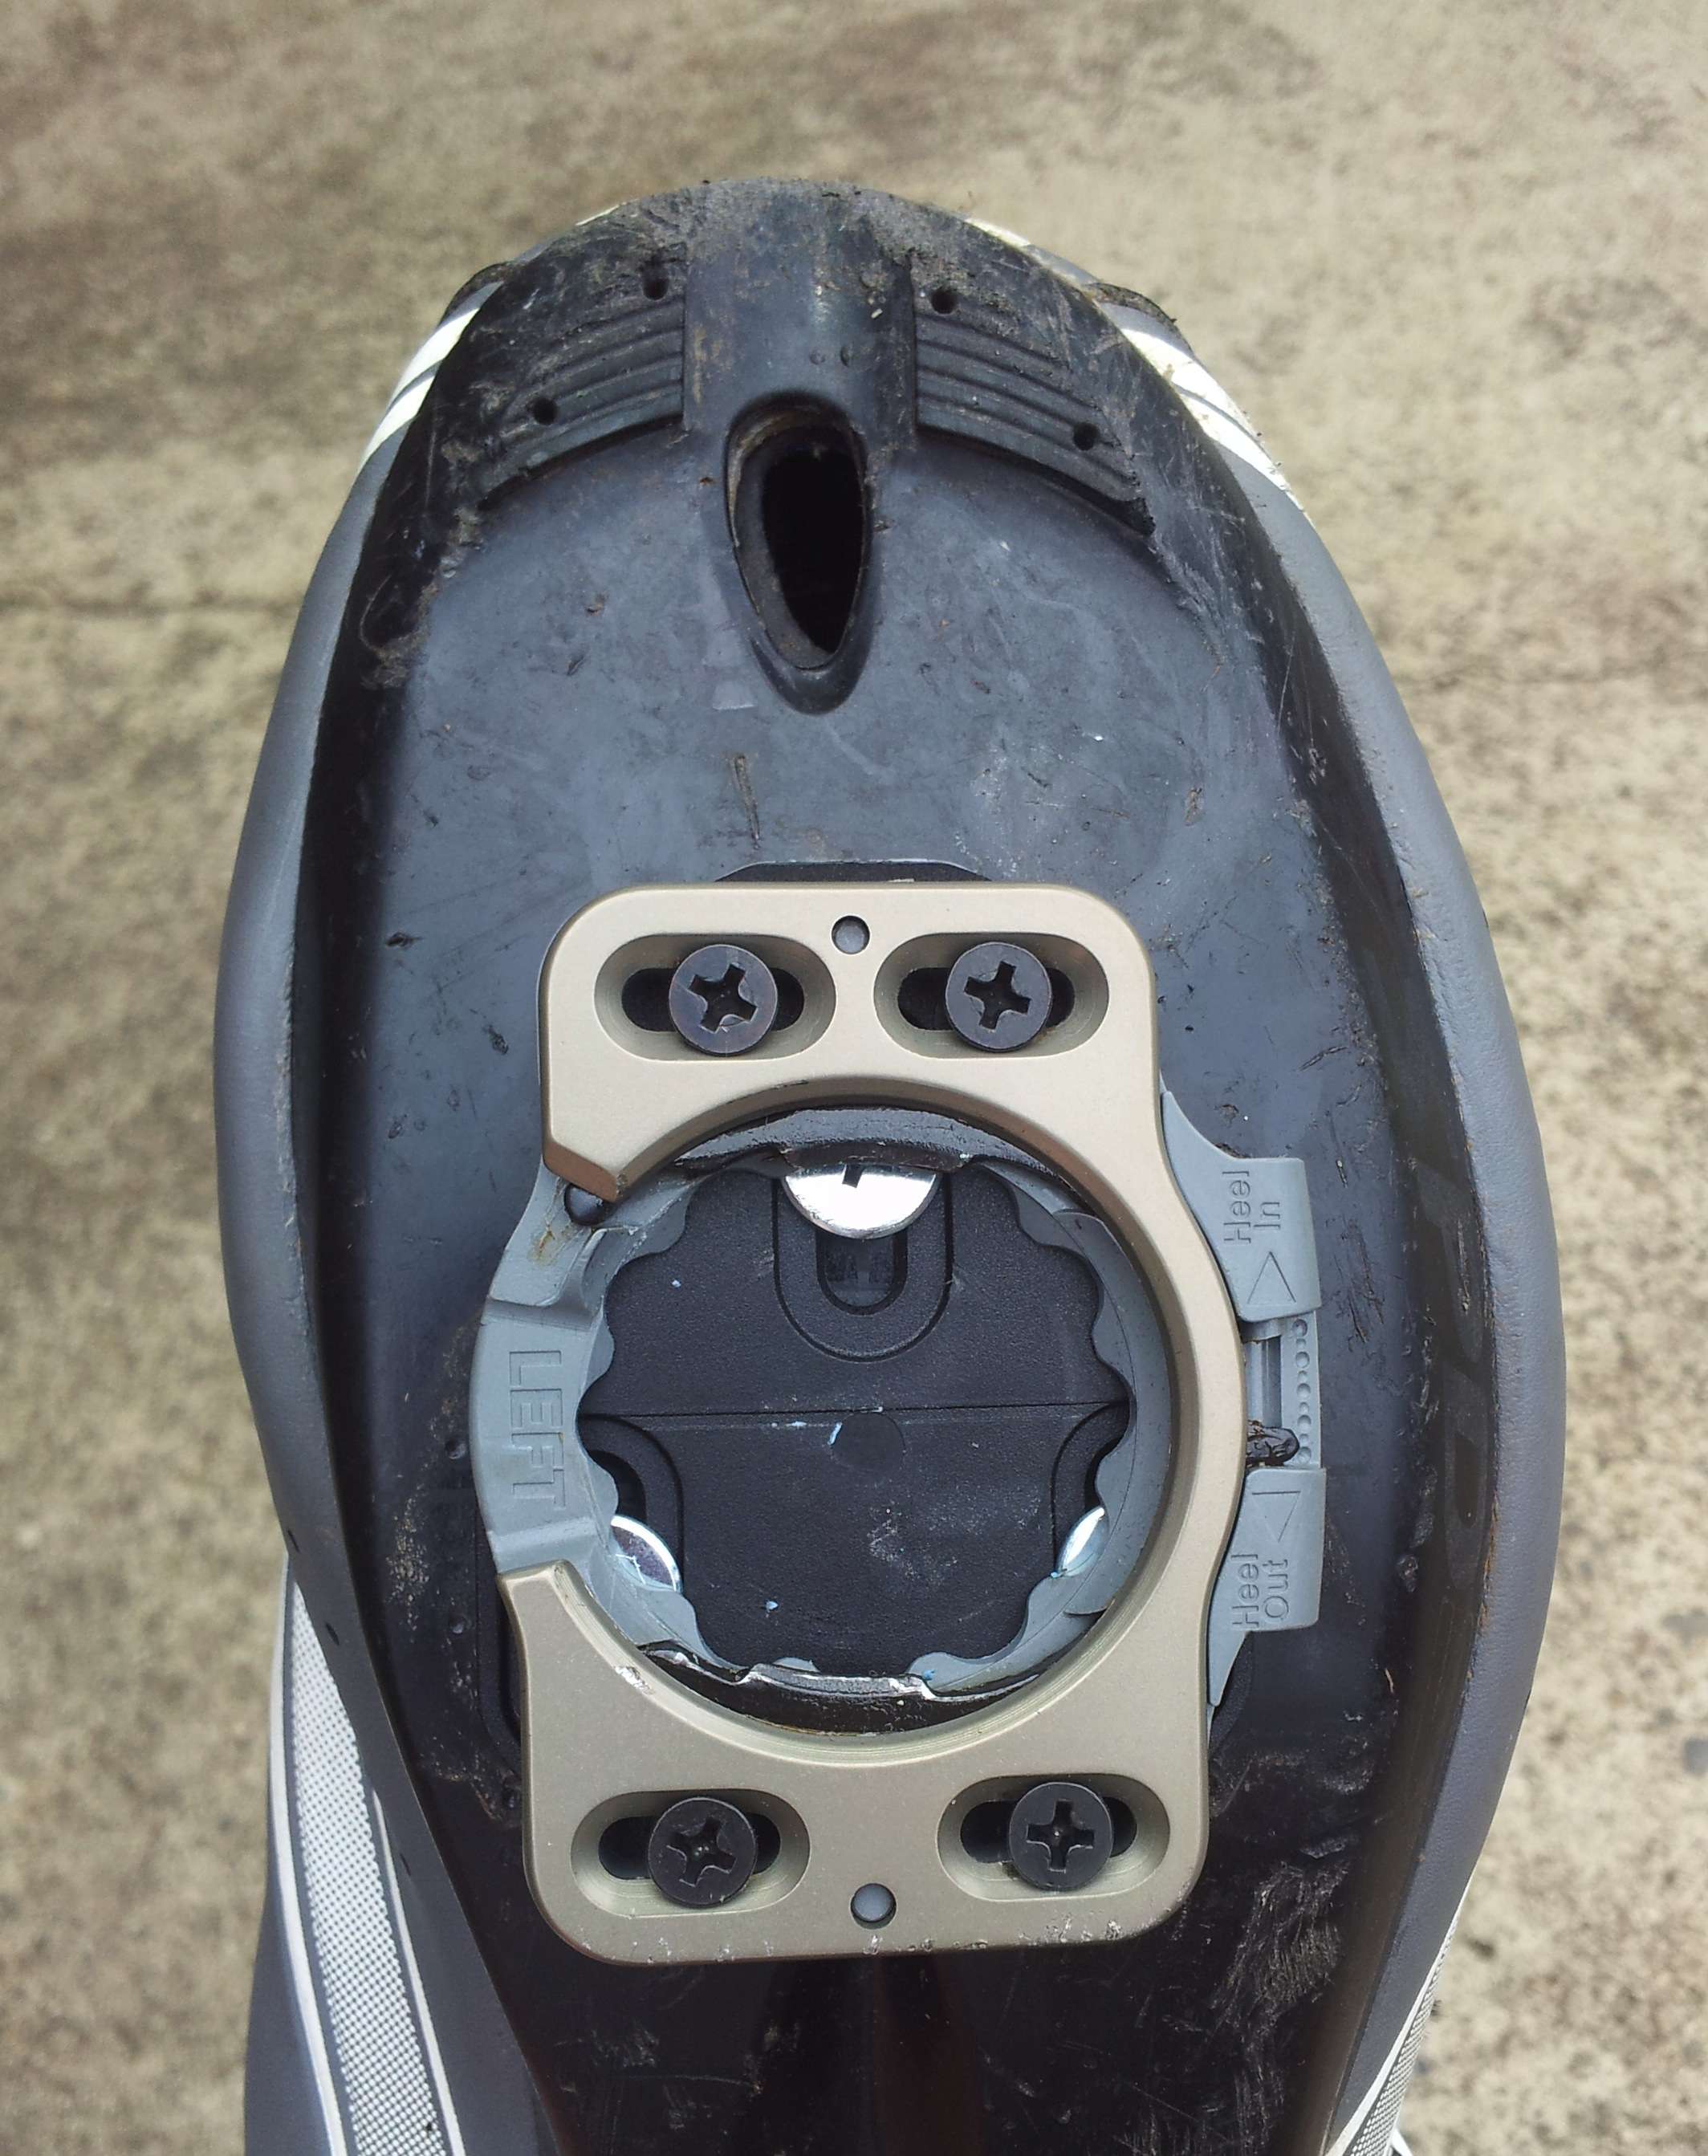
Cleat Mounted to base plate.
Tighten them up and your cleat is on. Obviously, there will be some playing around with cleat position fore and aft, but once your are happy, that is all that needs to be done.
The pedals went on easily, just a dab of grease on the thread and a 15mm pedal spanner and the job was done.
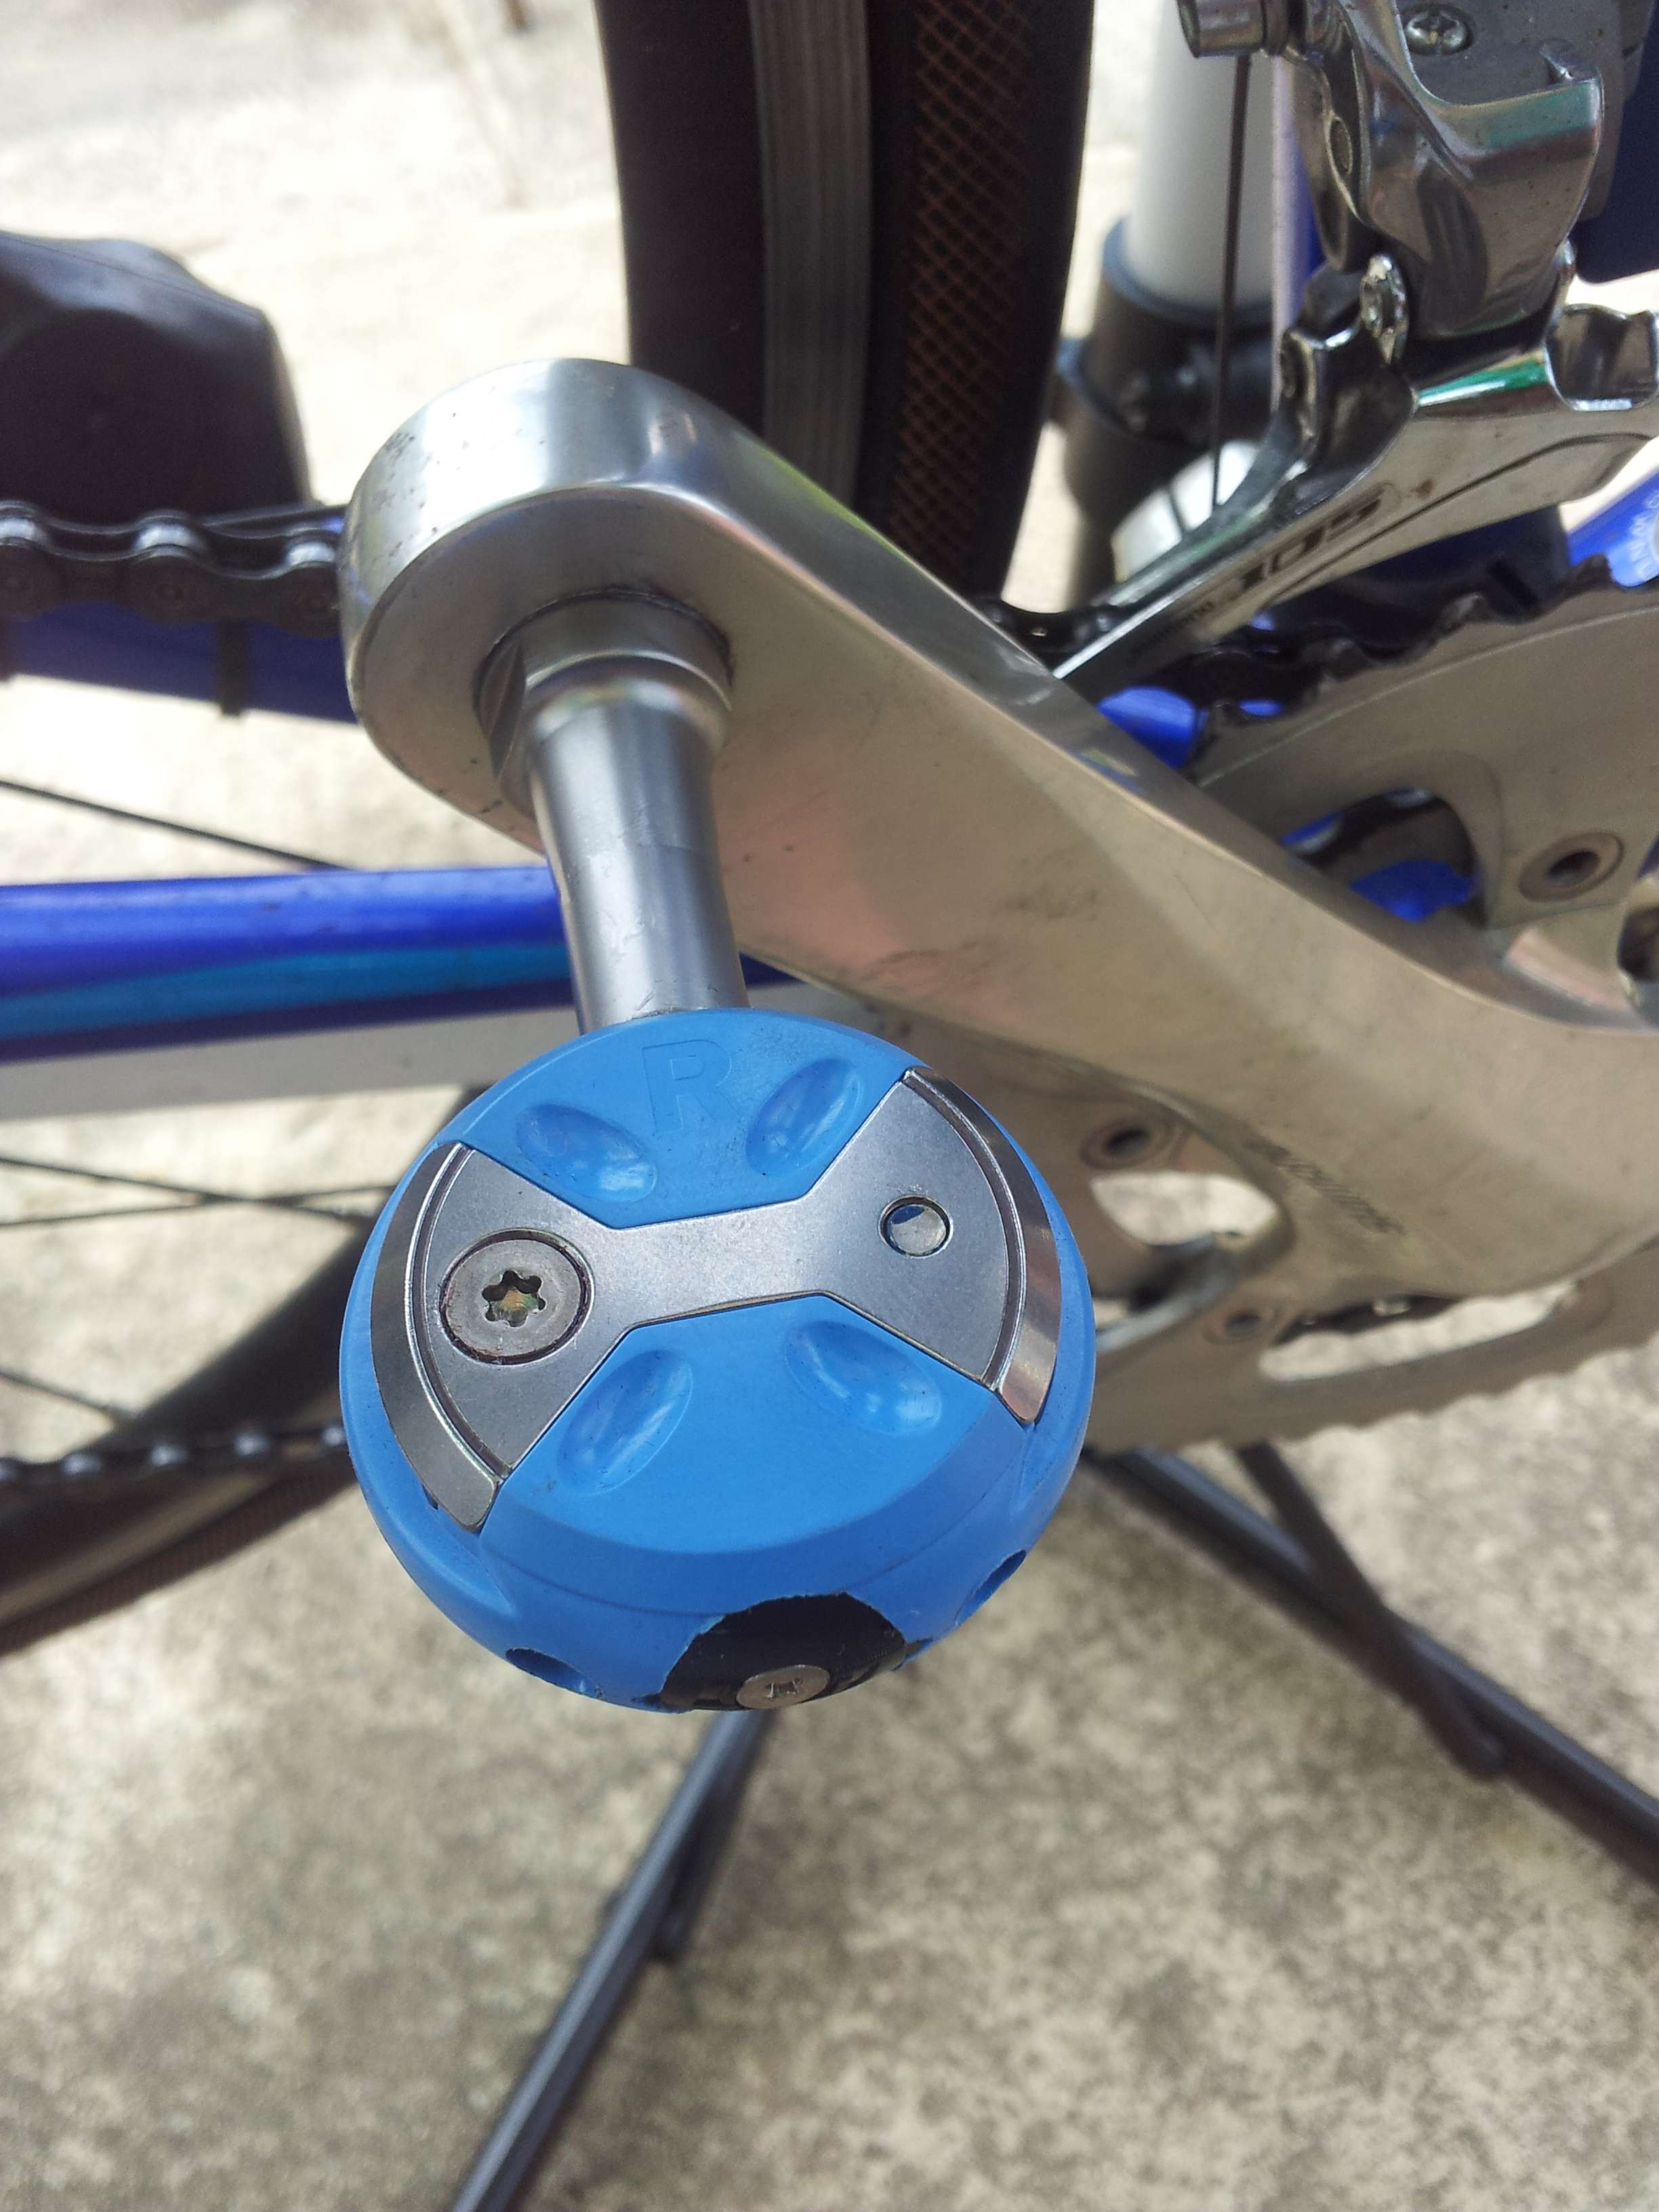
More Blue.
It took slightly longer to fit the cleats on the Speedplays than it did for the SPD-SLs. mainly because on the SPD-SL there is only 3 screws per shoe, where as the Speedplays have 7 in total per shoe. If you have a compatible shoe with 4 holes, it will be easier.
As a further comparison between the two brands, I took some photos of the height difference of the shoes with the cleats mounted.
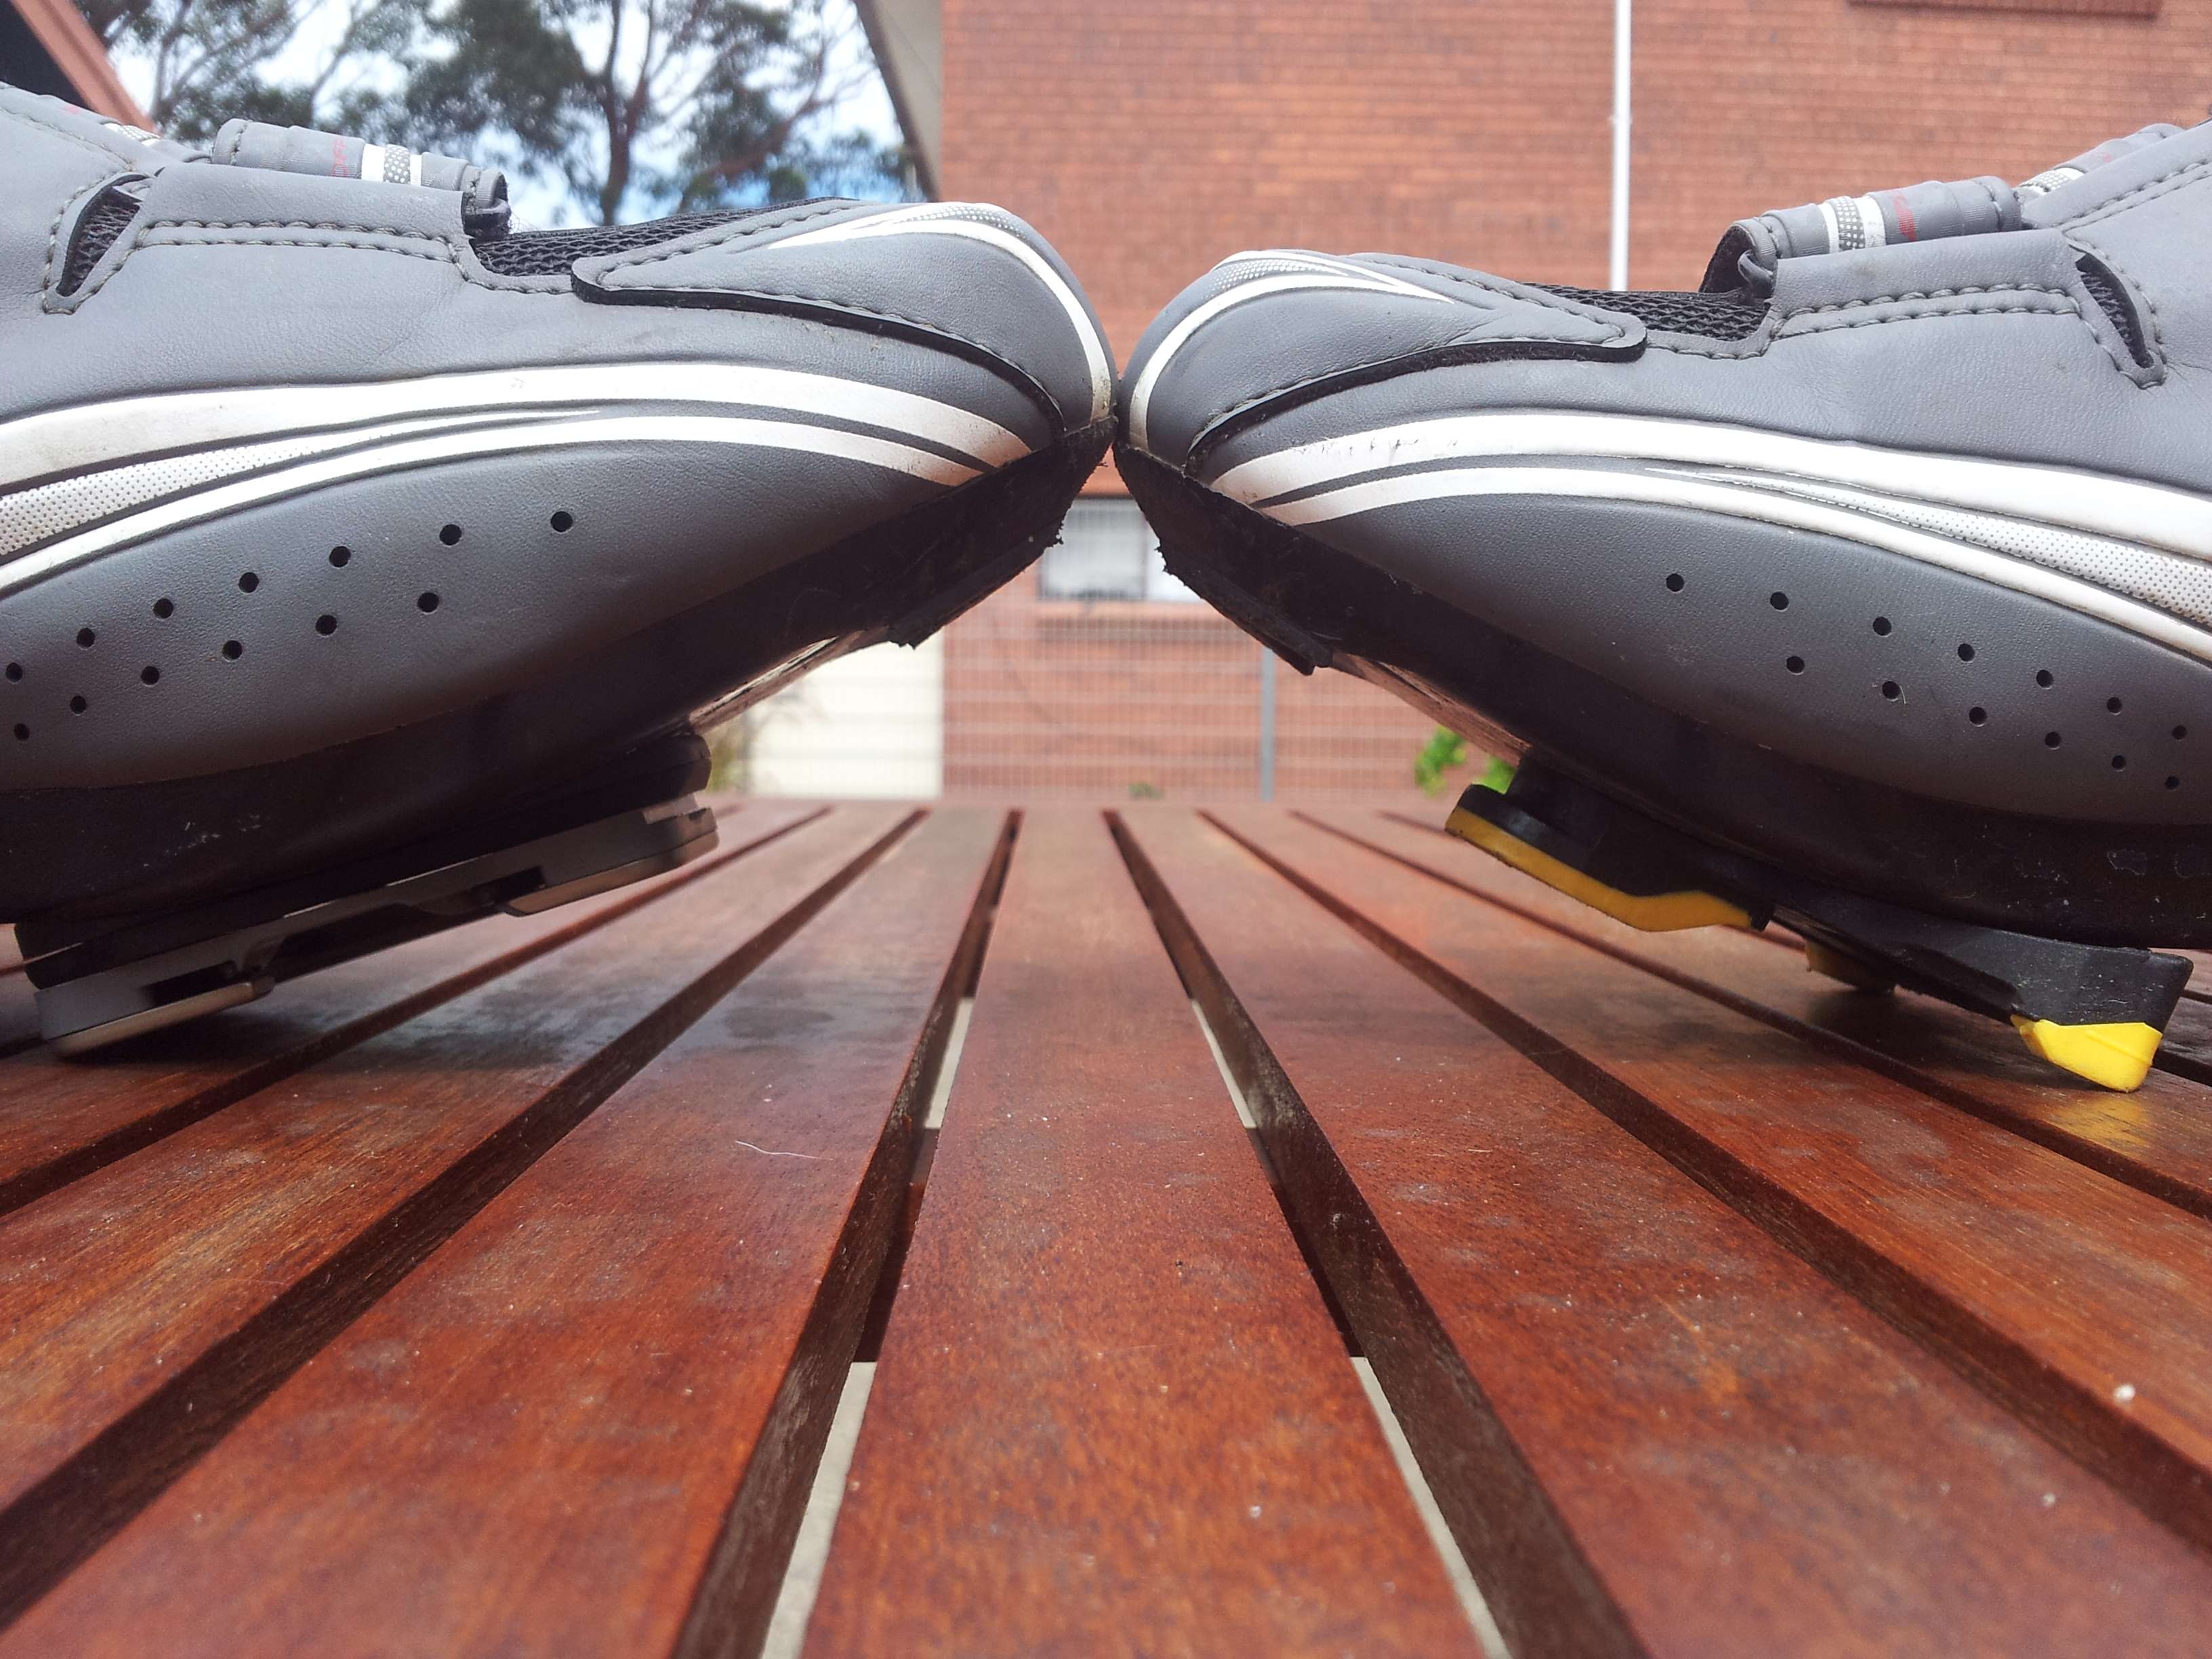
Speedplay (left) and SPD-SL (right)
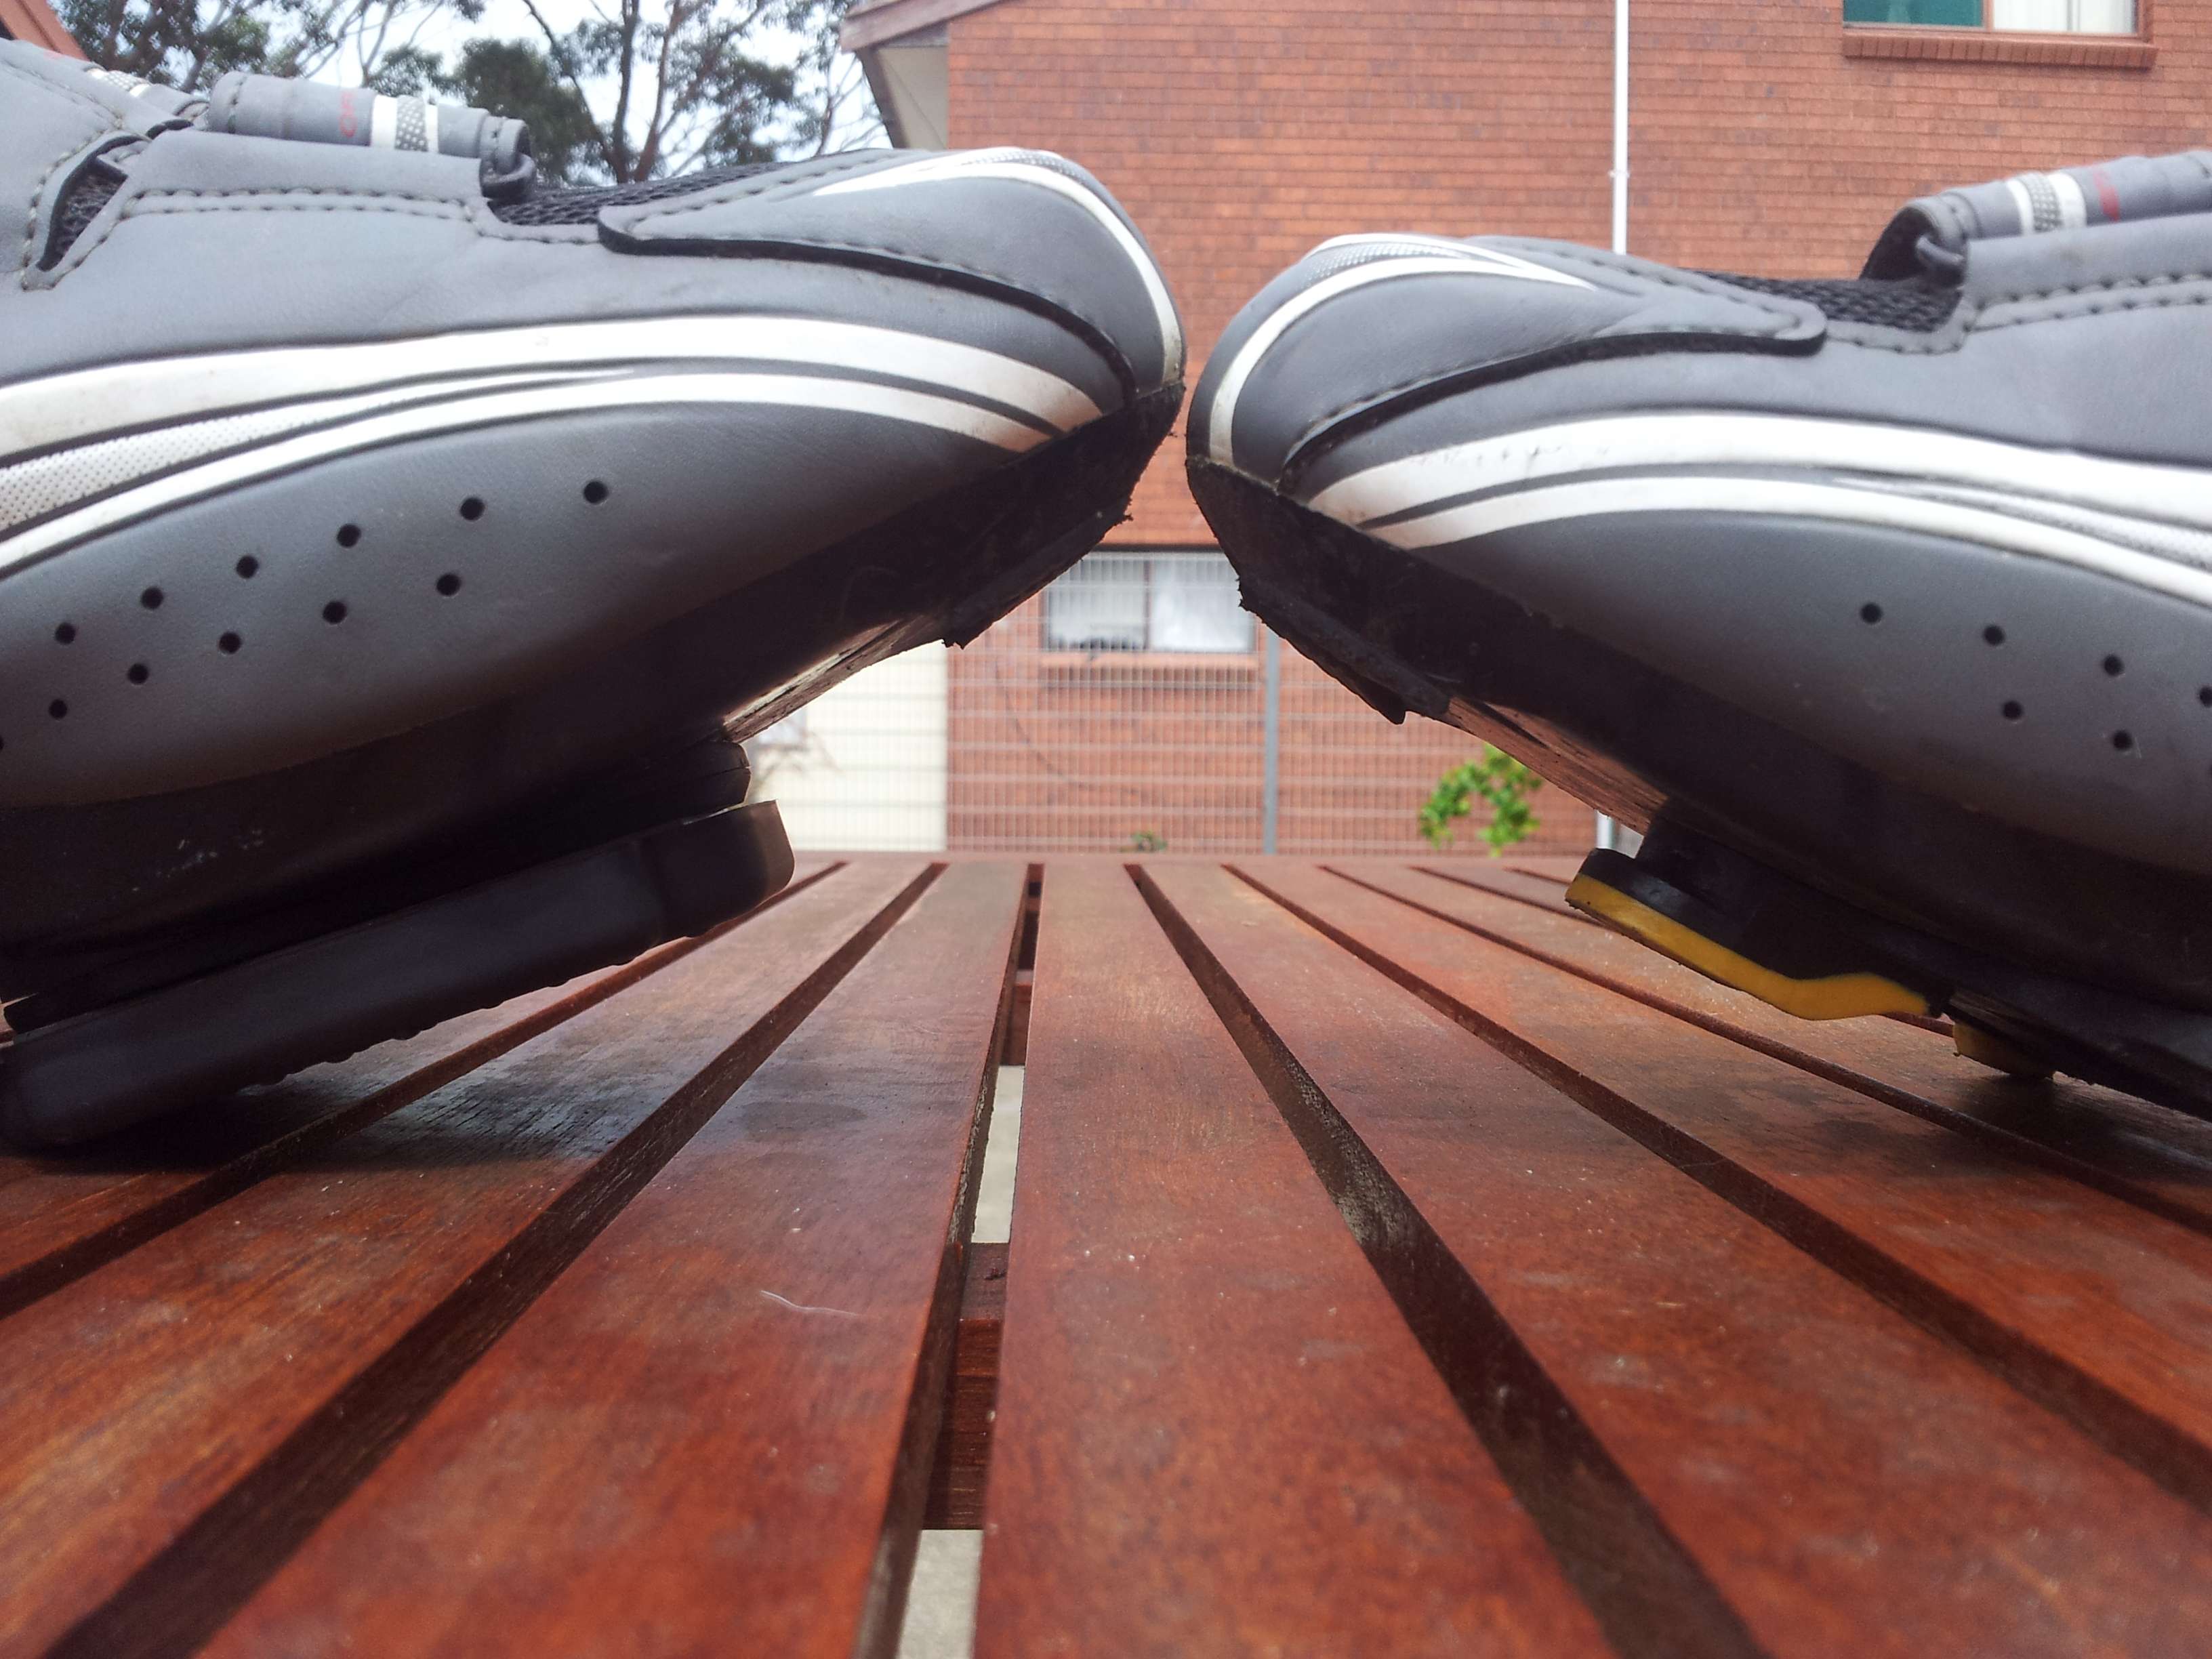
Speedplay with Coffee Shop Covers (left)
As you can see above, there is only a very small difference in added height with the adaptor plate. With the coffee shop covers, there is a bit more of a step up. It doesn’t look like a lot, but it feels like a lot when you walk in them.
The coffee shop covers are to protect the cleat when you are off the bike. They are extremely easy to put on and get off, and will fit in the pocket of your jersey or a saddle bag easily. They will also protect wooden flooring at home or out at your local cafe.
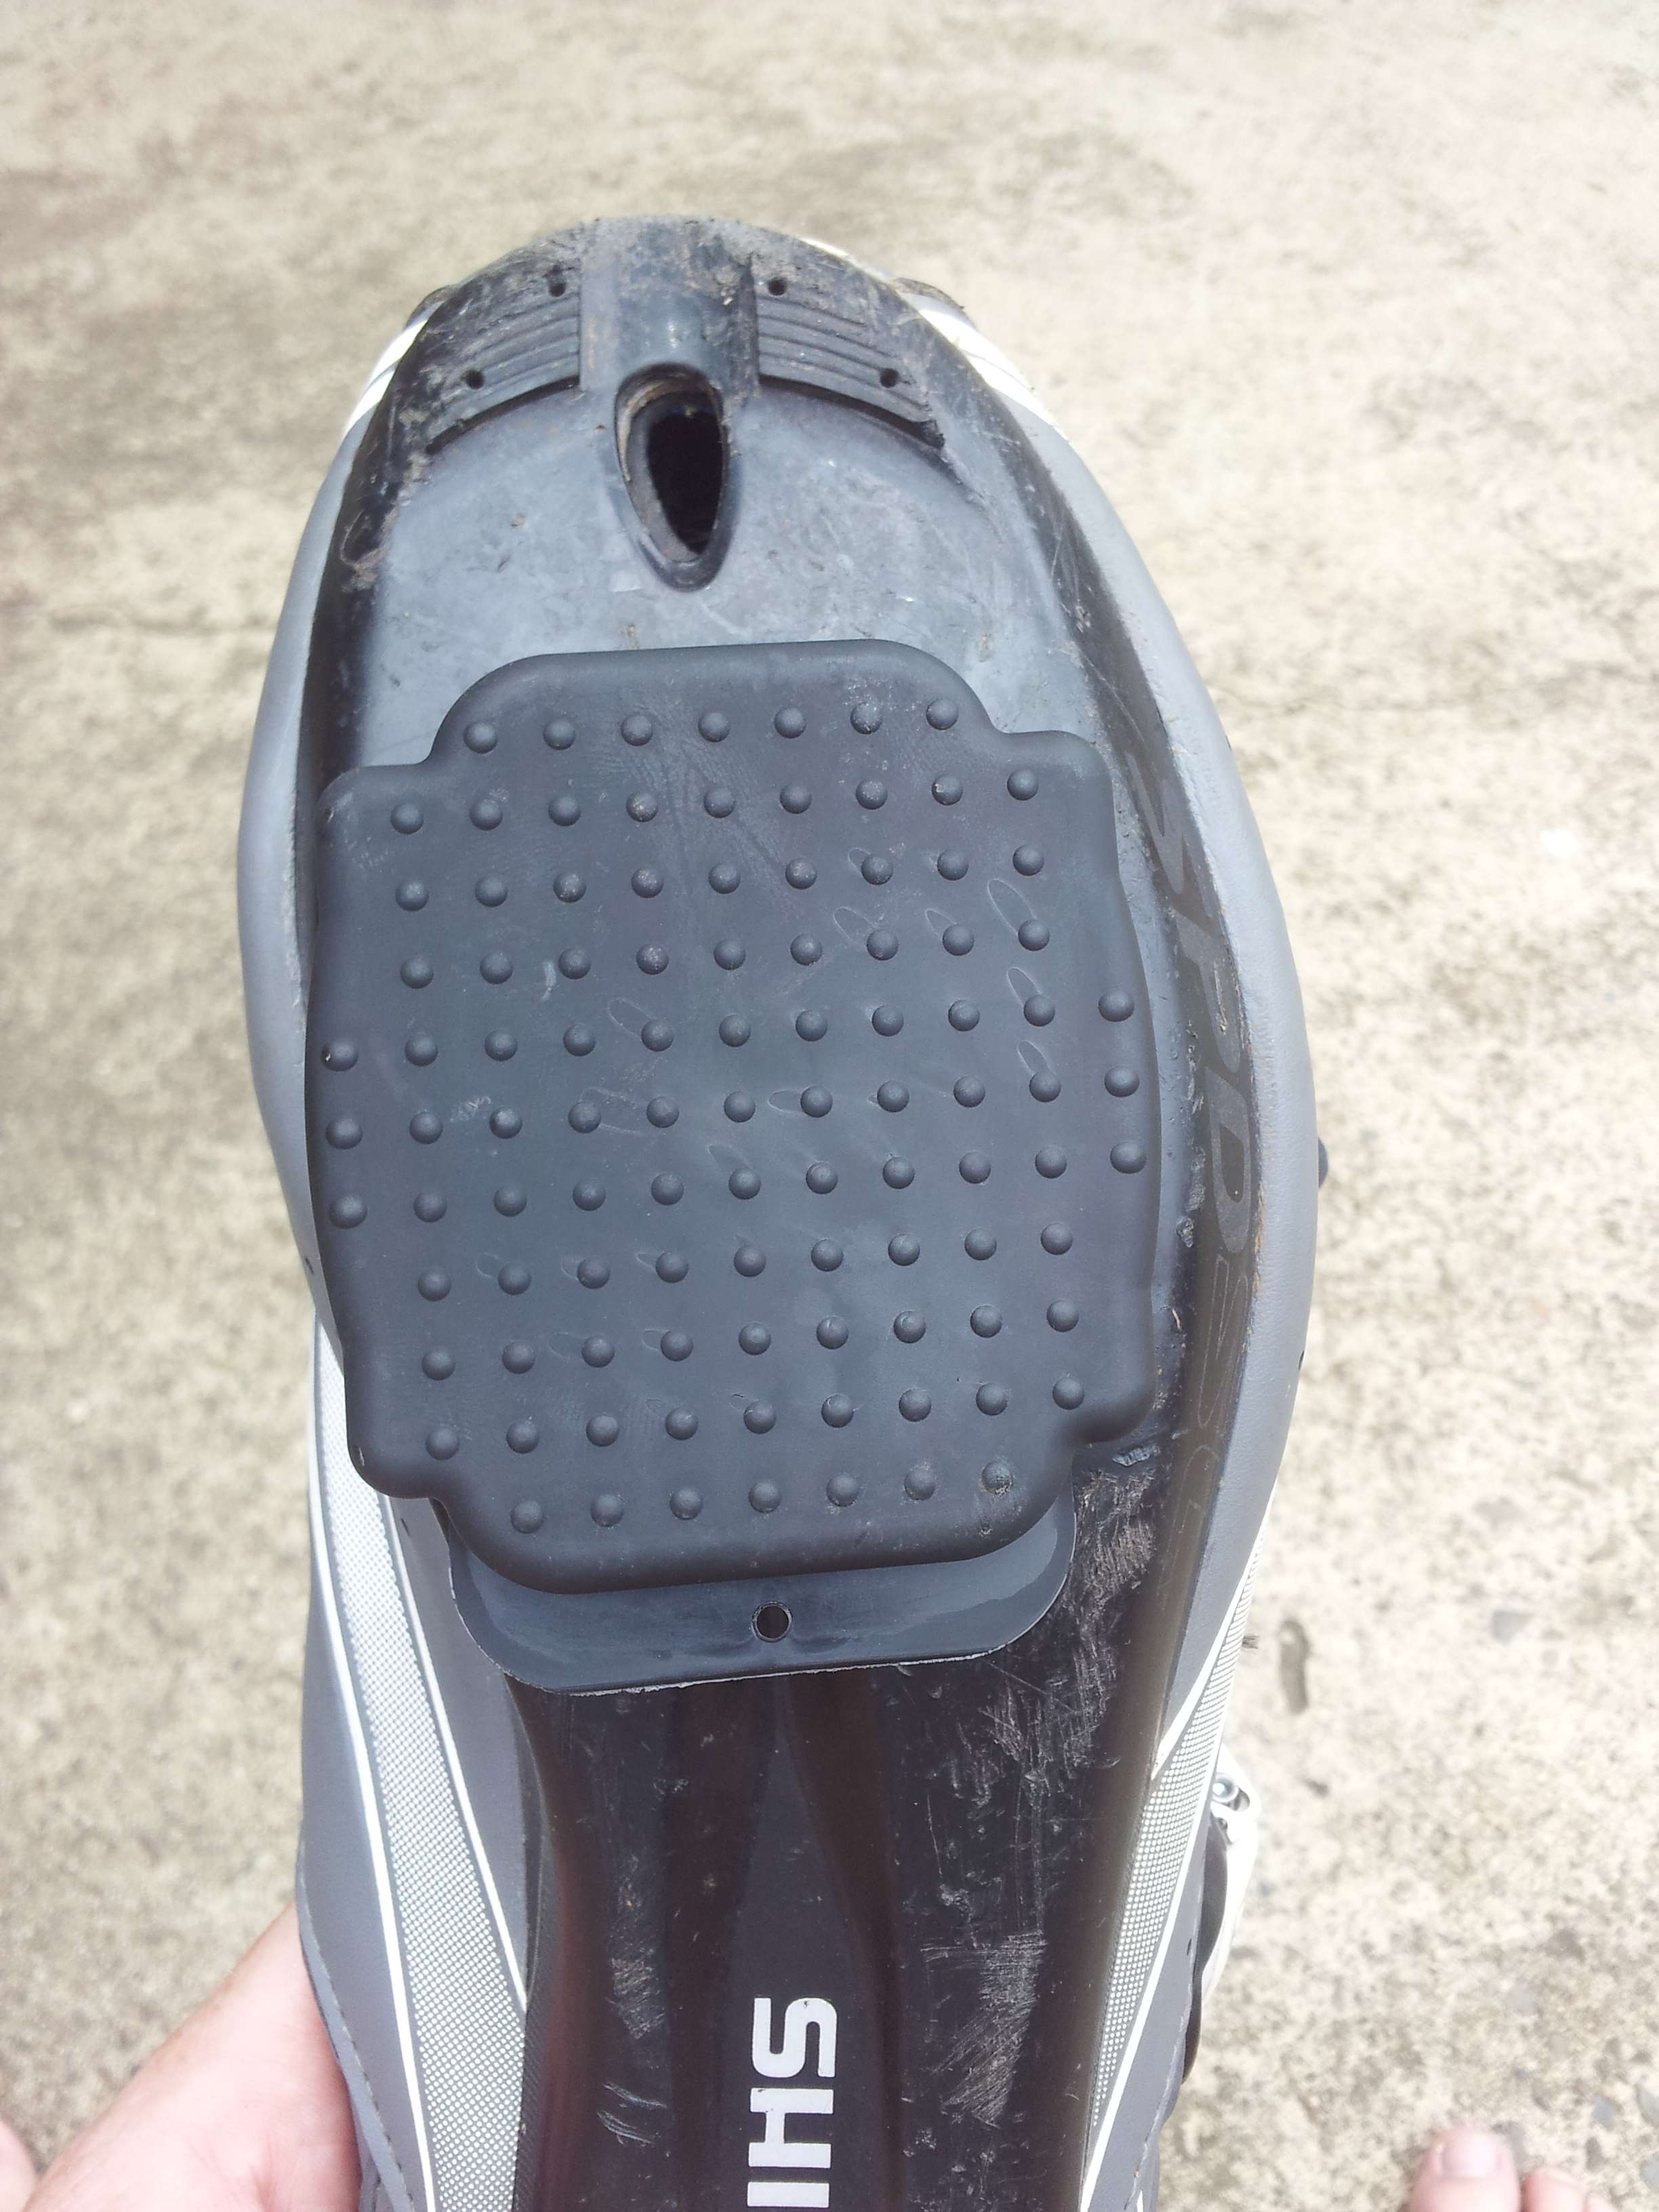
I also got the pedal platforms, so if I want to jump on the bike to go to the shops, I don’t need the bike shoes. They are easily fitted and great to use.
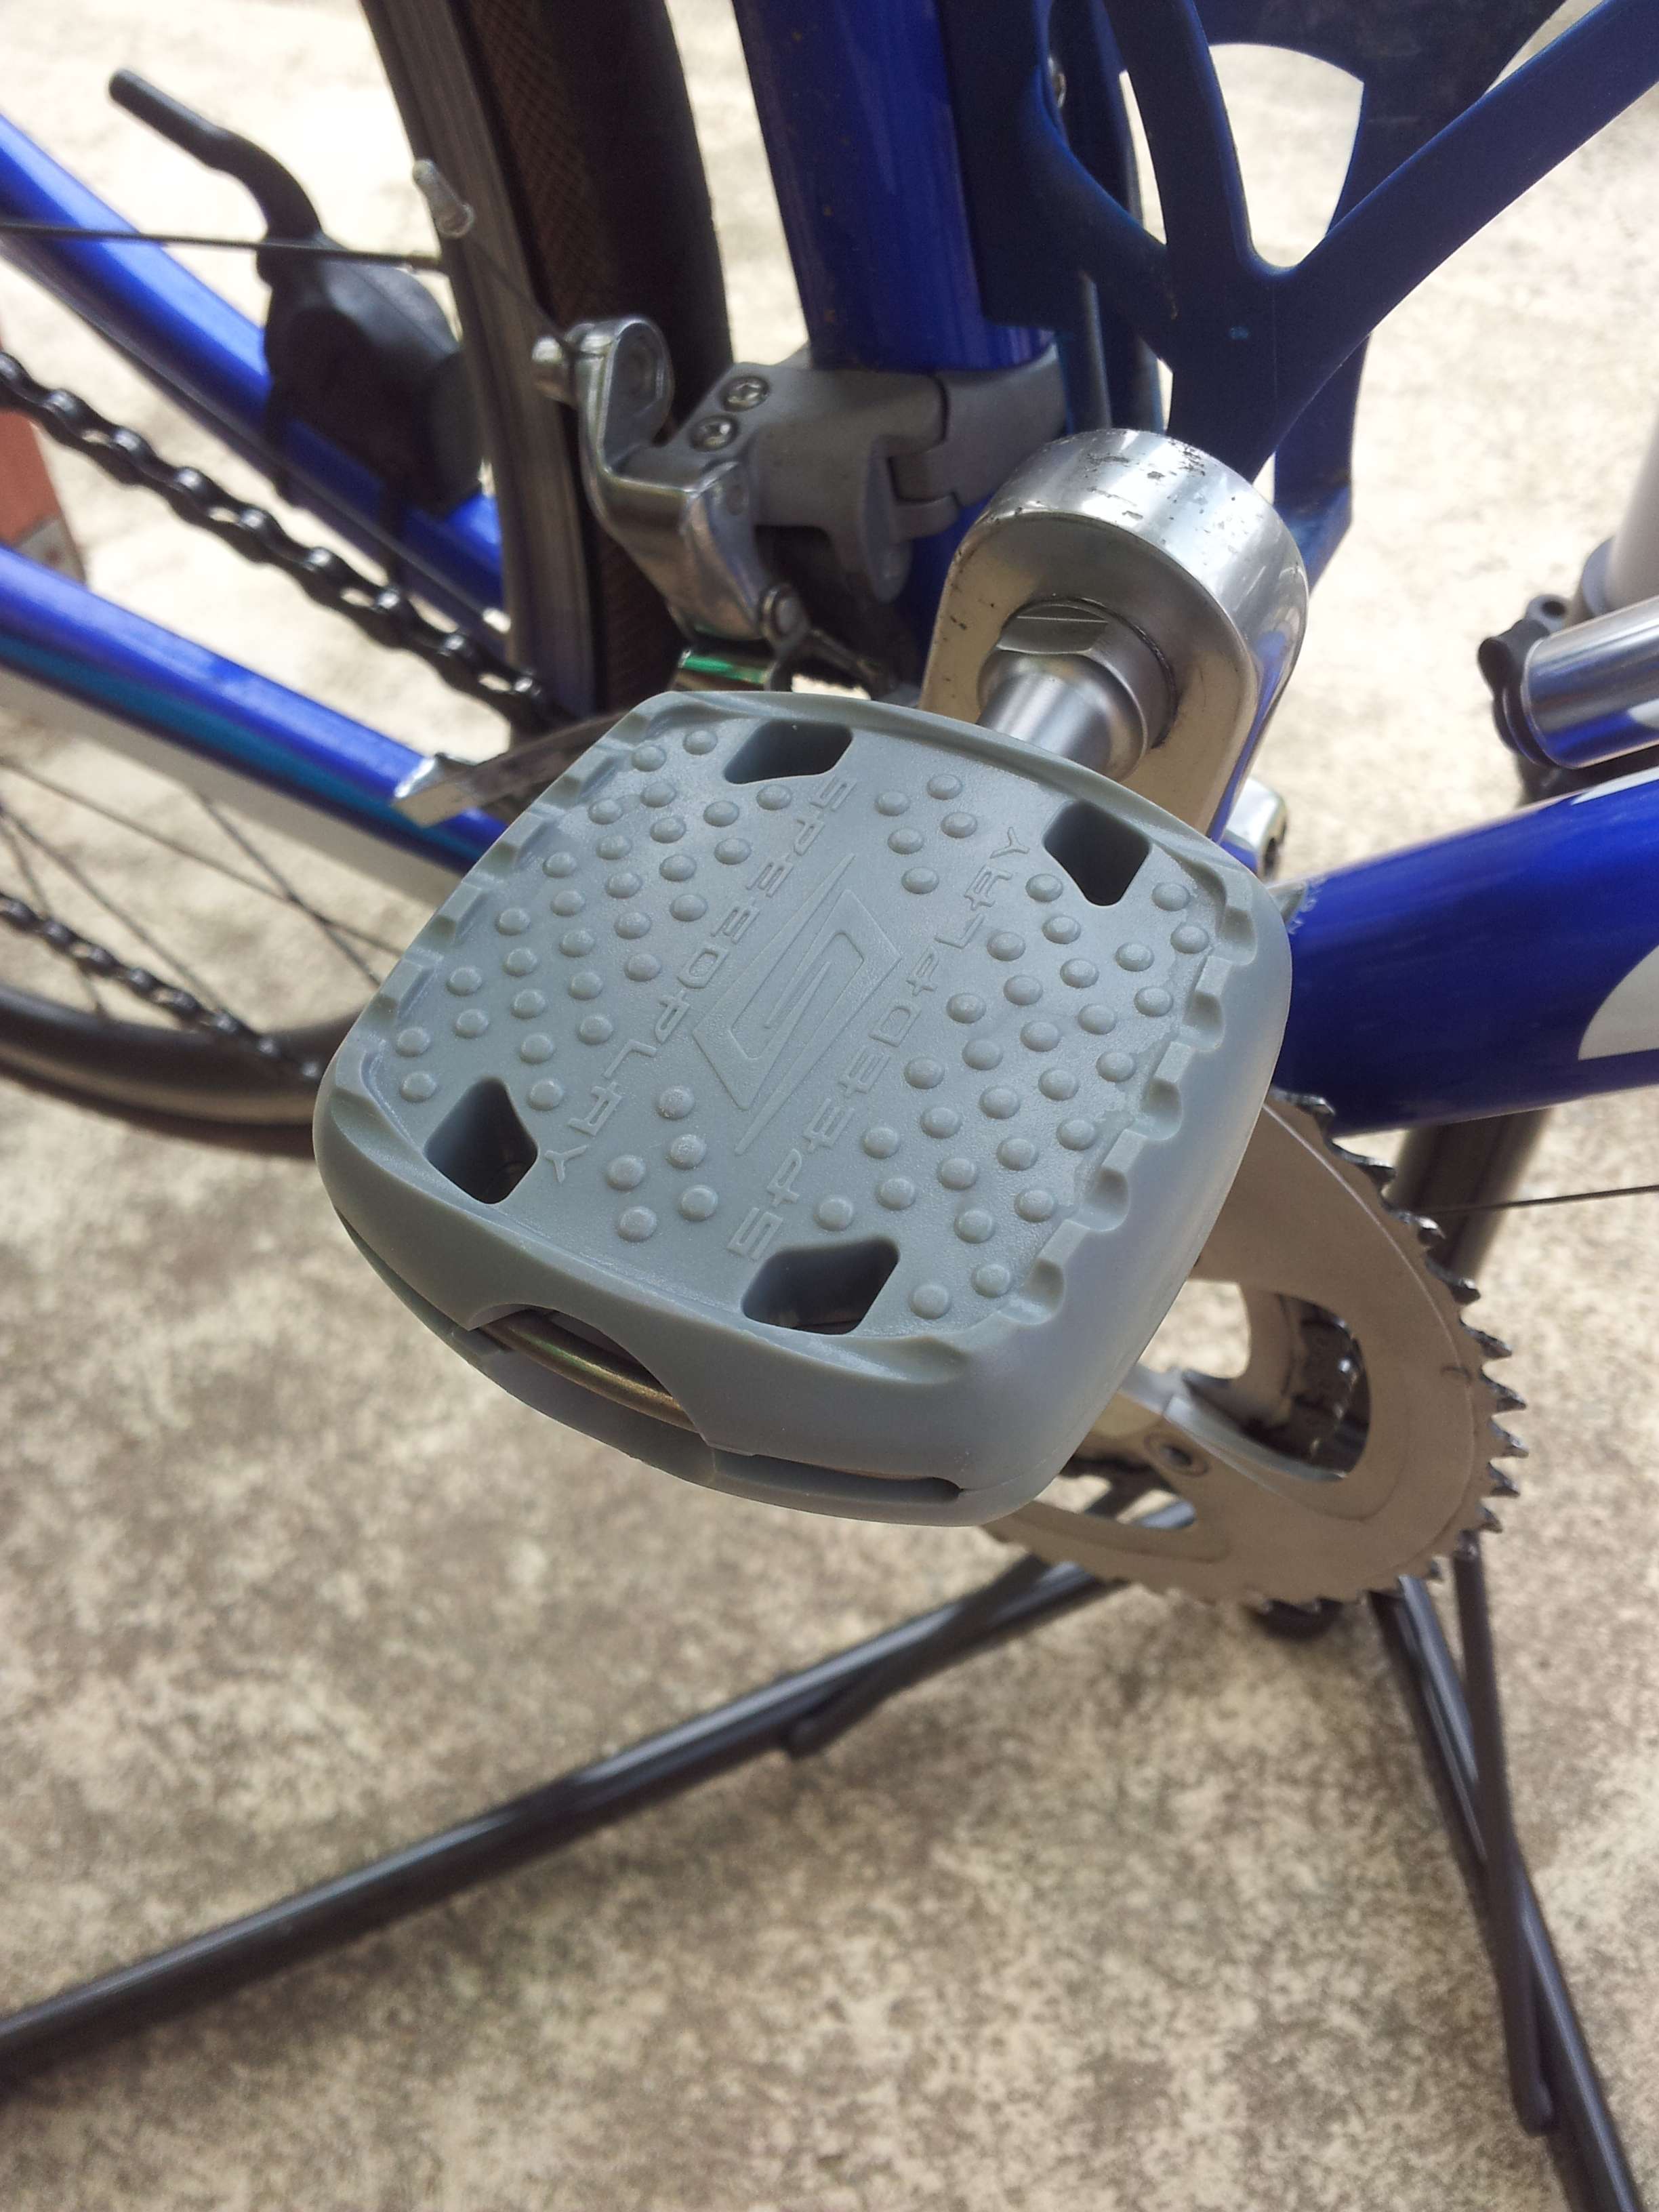
Pedal Platform
To fit them or remove them, you just need a coin or key to disengage the locking pins and then slide the pin out and the covers pull apart.
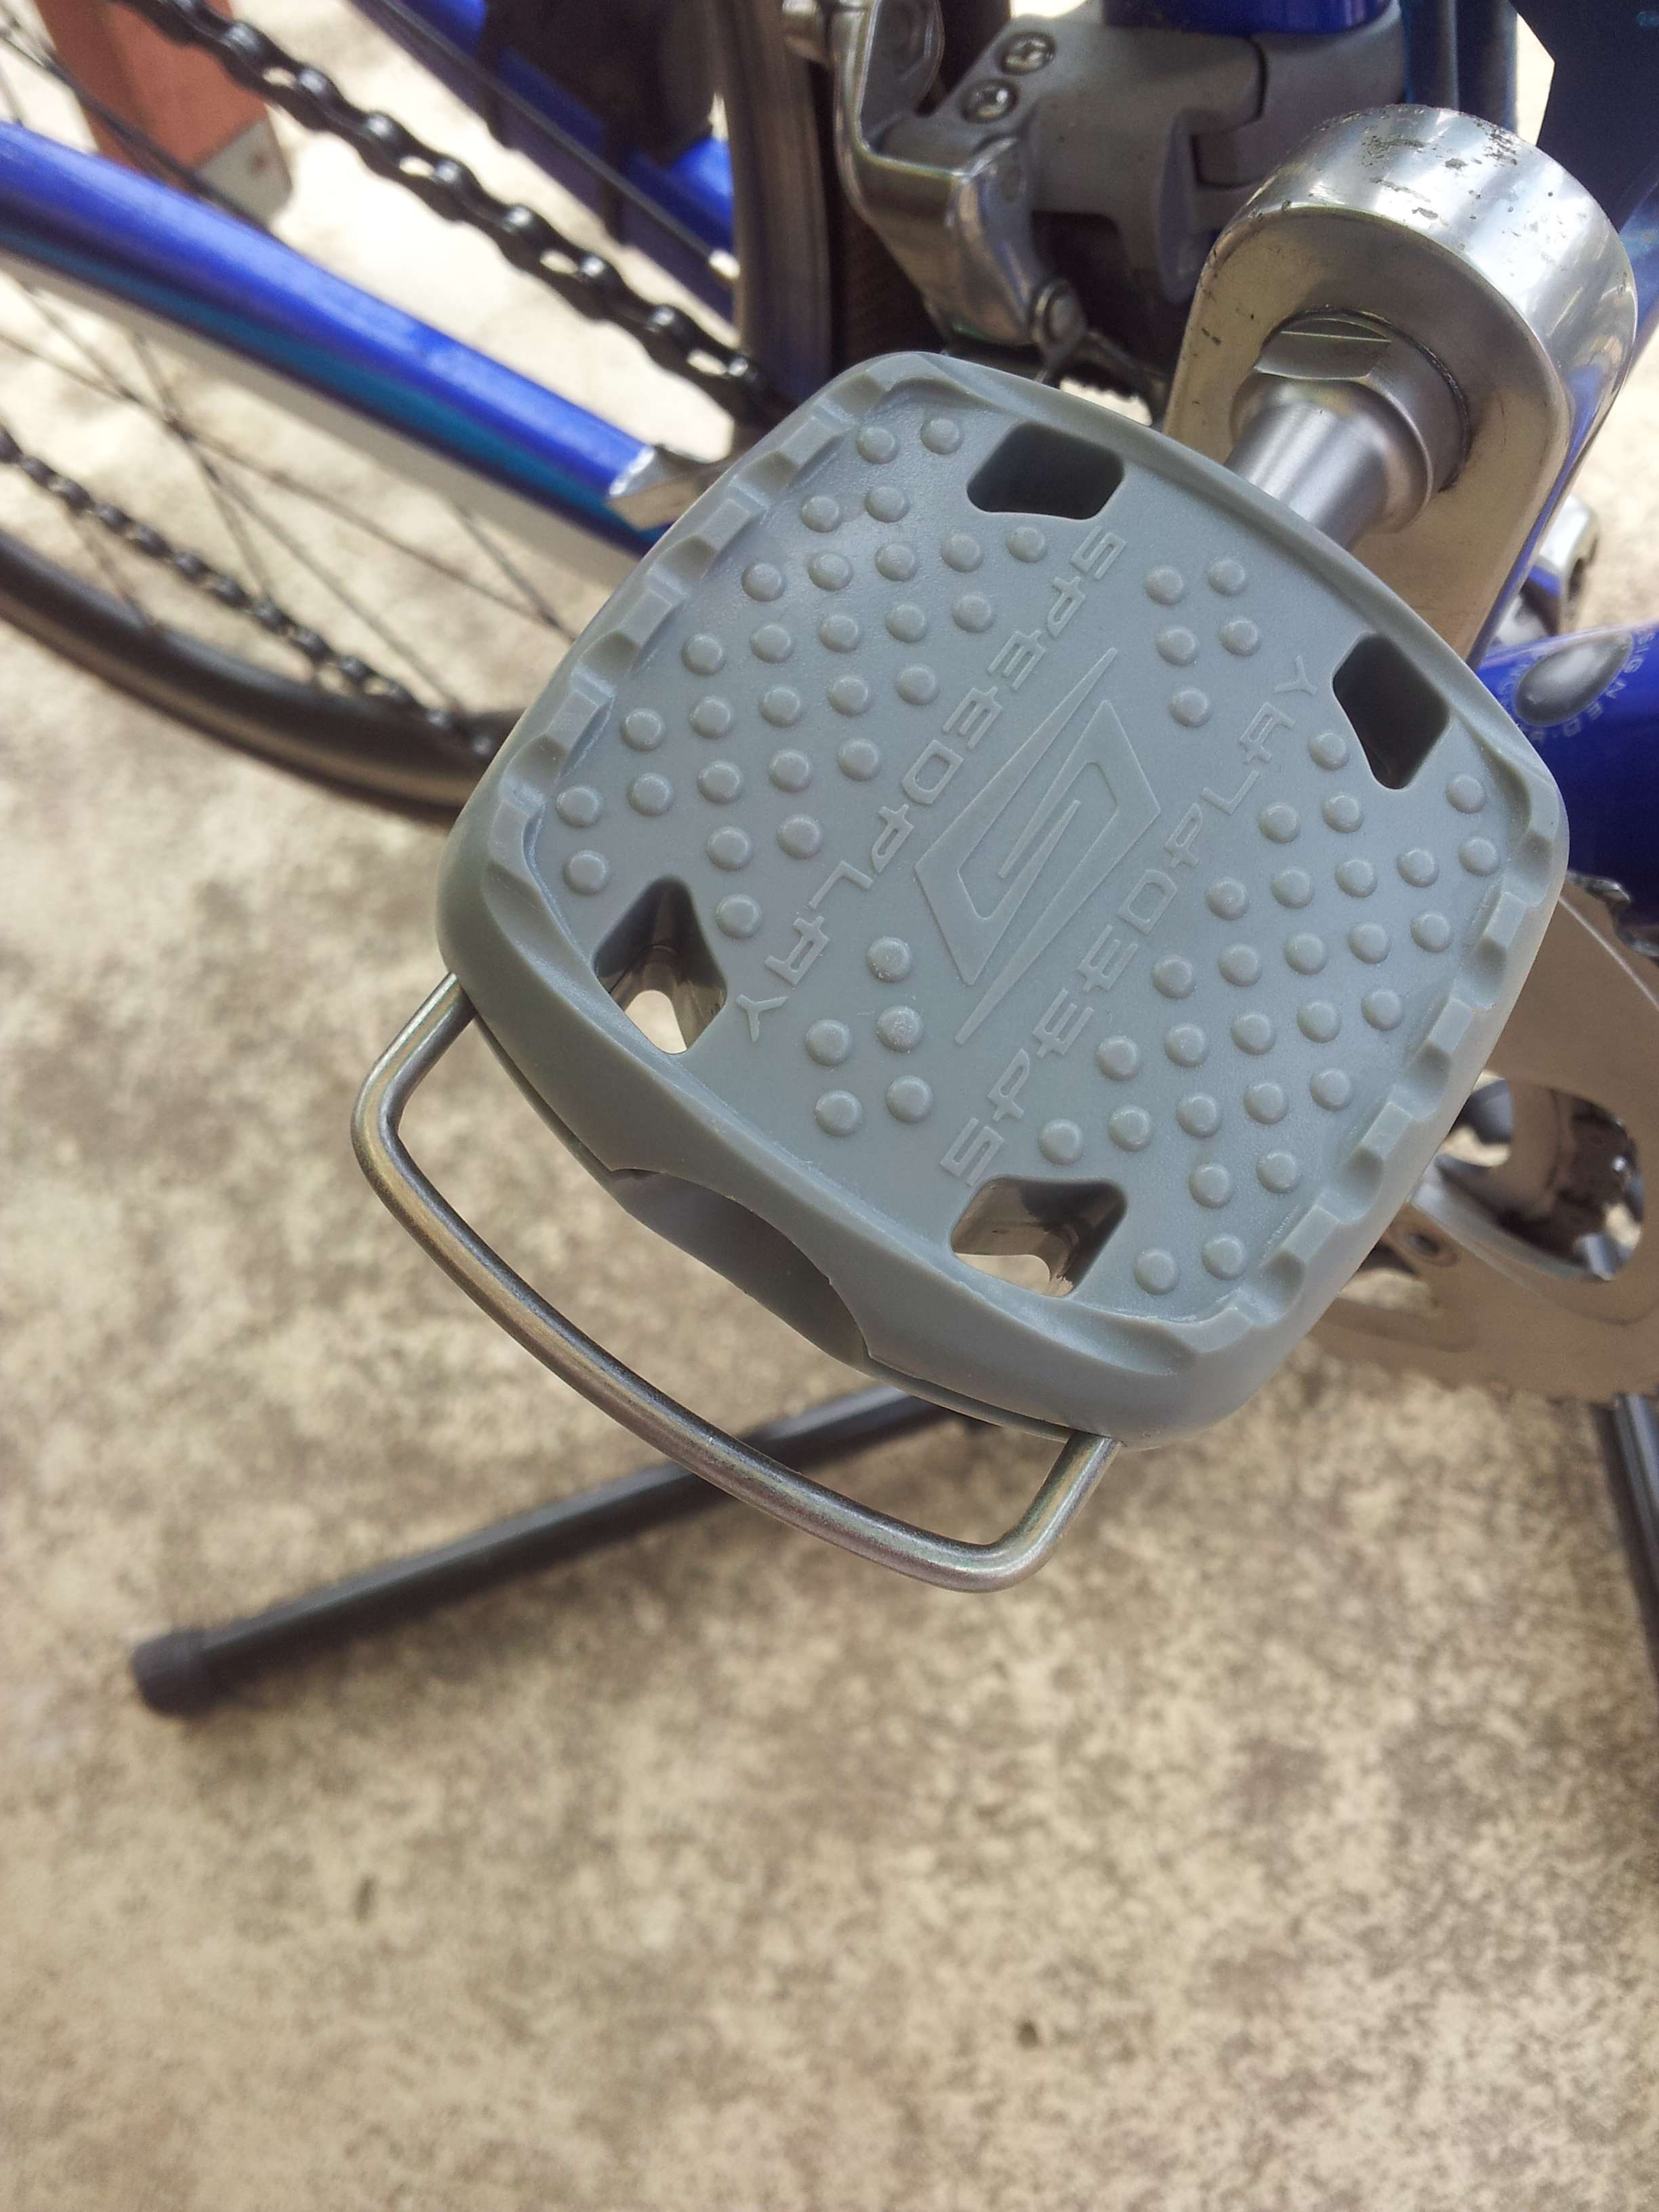
Pedal Platform Locking Pin Being Removed
Simple and easy.
I haven’t been out for a ride on the new pedals as yet, but when I do, I will do a review on their usage.
If you are new to the Clipless Pedal business, here is a terrific article explaining them in more detail.
Good post mate. So looks like you have to remove the cleat to adjust fore-aft position (via the base plate) bit of a pain until you get the right spot I suspect?
Funny how Speedplay’s are so Euro Cool but then you add the cafe & soft pedal covers. oooh!!!
They look pretty good. I always wondered what Steve Tyler did when he wasn’t on the road with Aerosmith.
Finally I can get a good nights sleep:-)